Tools & Ingredients
- A pre-prepared and dry fondant covered cake
- A batch of Royal Icing (your own recipe or our Royal Icing mixture).
- A spatula
- Adhesive tape such as masking tape- trial on your fondant in an inconspicuous area first
- Metal scraper or ruler
- A toothpick for tidying up
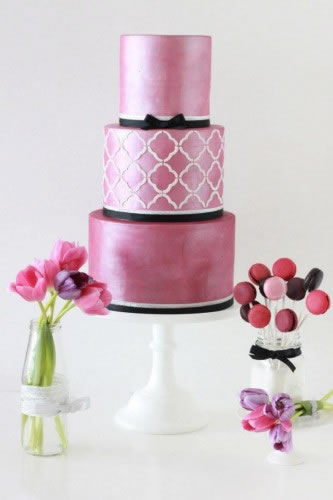
Method
STEP 1
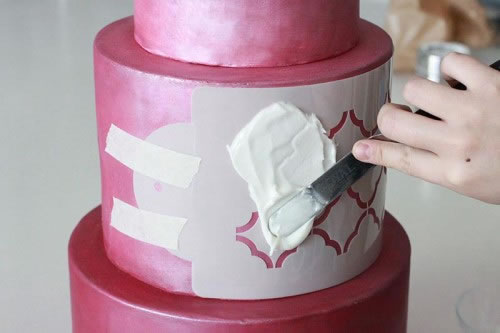
Apply decorating stencil to dry (overnight) fondant cake using adhesive tape. Test tape in an inconspicuous place first to be sure the tape doesn’t pull at your fondant.
STEP 2
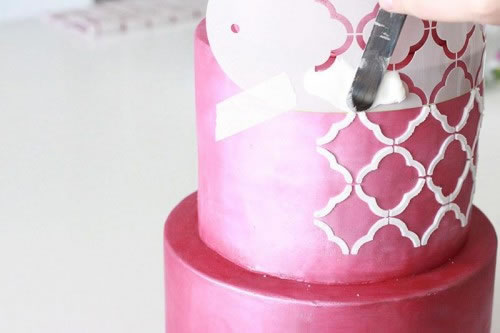
Prepare Royal Icing according to pack instructions, then add additional icing sugar to create a thick, stiff consistency. Spread thickly over taped stencil.
STEP 3
Use a scraper or ruler to evenly remove excess icing off stencil.
STEP 4
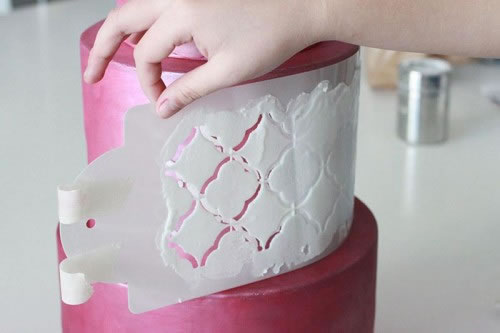
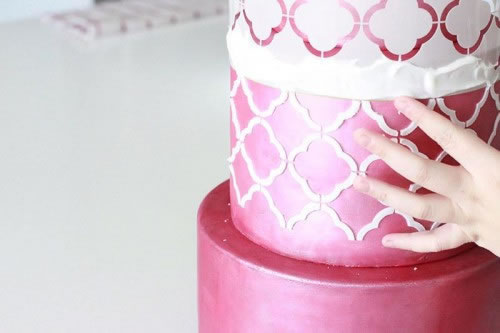
Carefully remove stencil from cake, pulling from left to right.
STEP 5
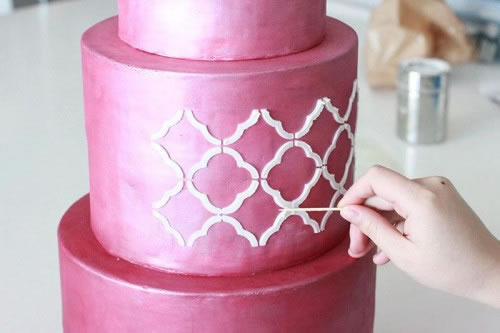
Tidy up any bleeding using a toothpick or damp cloth. Allow Royal Icing to fully dry before completing pattern on cake.
STEP 6
To complete the stencil pattern, tape clean stencil to area of cake where pattern needs finishing (top and/or bottom). Repeat steps 2-4, then your beautiful design is complete!
To see the original tutorial and discover more of Sharon’s wonderful creations, please visit her website.

ABOUT SHARON WEE
Sharon Wee of Sharon Wee Creations is one of Australia’s leading cake decorators. In between creating spectacular cakes for her clients, writing her own books, keeping a blog, guest teaching on Craftsy and demonstrating at events and shows, Sharon creates fun, achievable and quick video tutorials to encourage everyone to try their hand at decorating.
To discover more of Sharon’s work, please visit her website, YouTube Channel, buy her book, read her blog or follow her on Facebook.



Comments & Reviews